
How to Install Let’s Encrypt Free SSL Certificate on your GoDaddy Server (Step by Step)

Security is extremely important for any website or blog, build the trust of your site visitors and for better ranking. So it time to improves your site security with SSL/TLS Certificate. Google announced that switching a website over to the HTTPS would also boost the search engine ranking so you may consider having this for your blog as well.
Many website or blog owner think my site doesn’t have forms or collect information from users.
But It doesn’t matter. HTTPS protects more than just form data! but HTTPS keeps the URLs, headers, and contents of all transferred pages confidential.
In this article you will learn how to install let’s Encrypt Free SSL certificate step by step using zerossl.com installation tool. zerossl.com provide free SSL Tools for your website.
Let’s Encrypt – Free SSL/TLS Certificates
Let’s Encrypt organizations provides free SSL Certificates and a global Certificate Authority (CA). Let’s Encrypt certificates can be used by websites to enable secure HTTPS connections.
How to install Let’s Encrypt in Godaddy or Cpanel
In the below step we will explain you how to install let’s Encrypt Free SSL certificate on your GoDaddy Server (Step by Step) using zerossl.com installation tool –
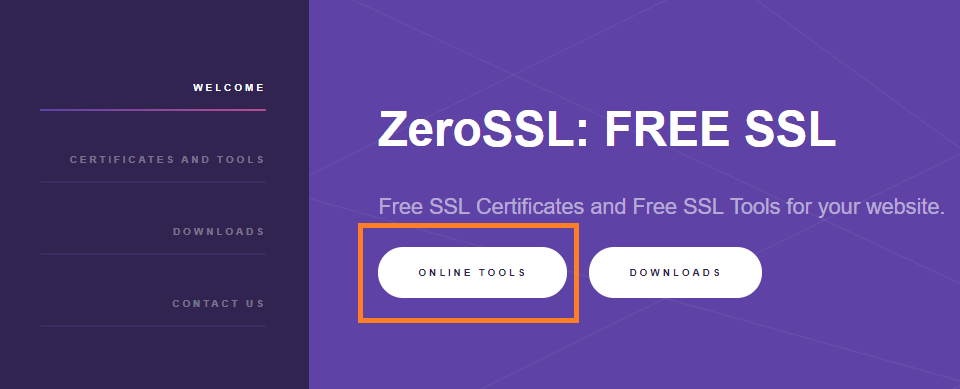
1. Go to zerossl installation tool.
2. Click on Online Tools button.
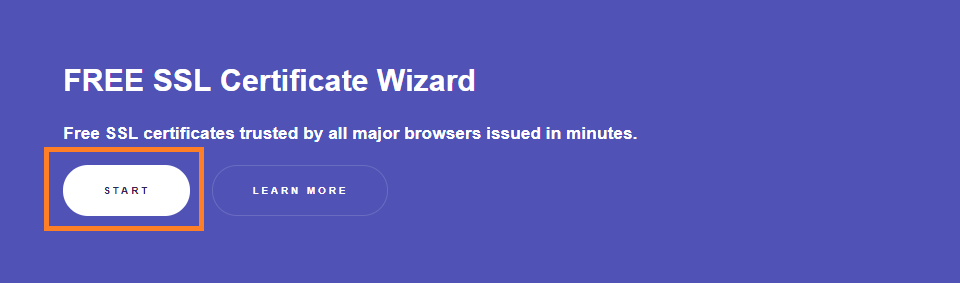
3. Click on Start button.
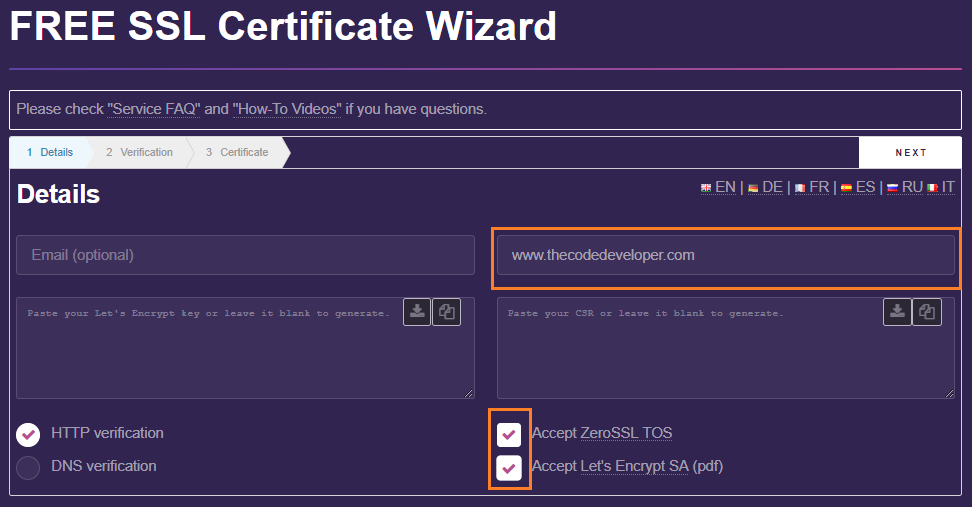
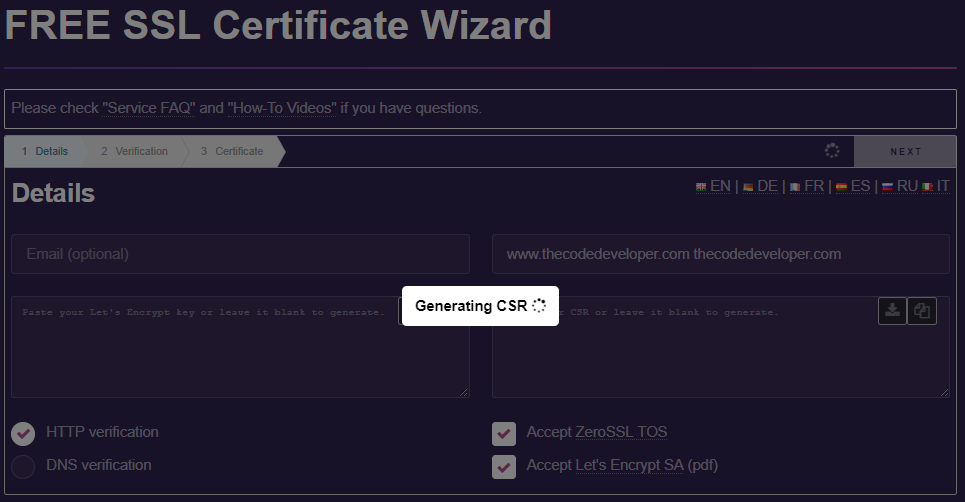
4. On the right-hand side corner, you have a field called “Domains (ONLY if you have NO CSR)”.
Add your own domain name in this text field without include http:// or https://, In my case i added my domain name www.thecodedeveloper.com. Before click Next button accept both terms of services in right side bottom –
Accept ZeroSSL TOS
Accept Let’s Encrypt SA (pdf)
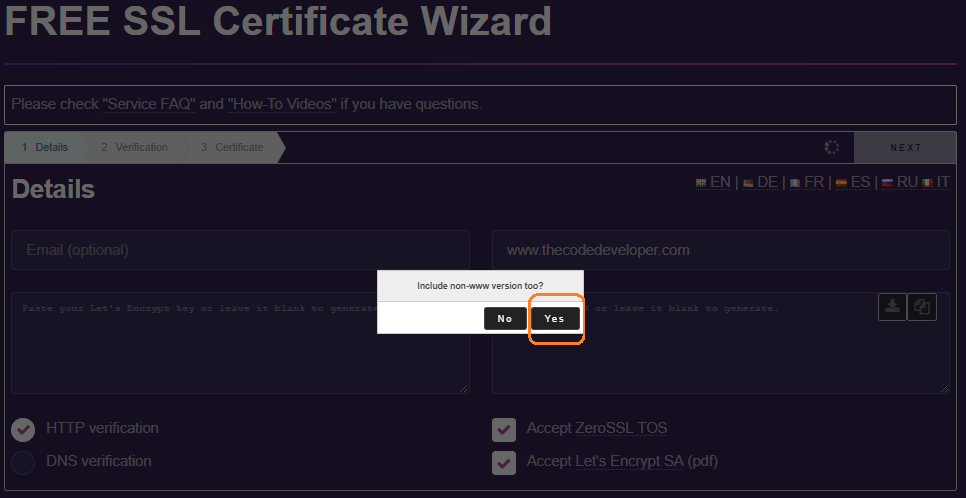
5. Hit Next button in the top right side, then a pop will come and ask – Include www-prefixed version too? Click yes button to continue.
6. Zerossl tool will start generate CSR (Certificate Signing Request).
7. Once generate CSR process completed then copy or download your CSR.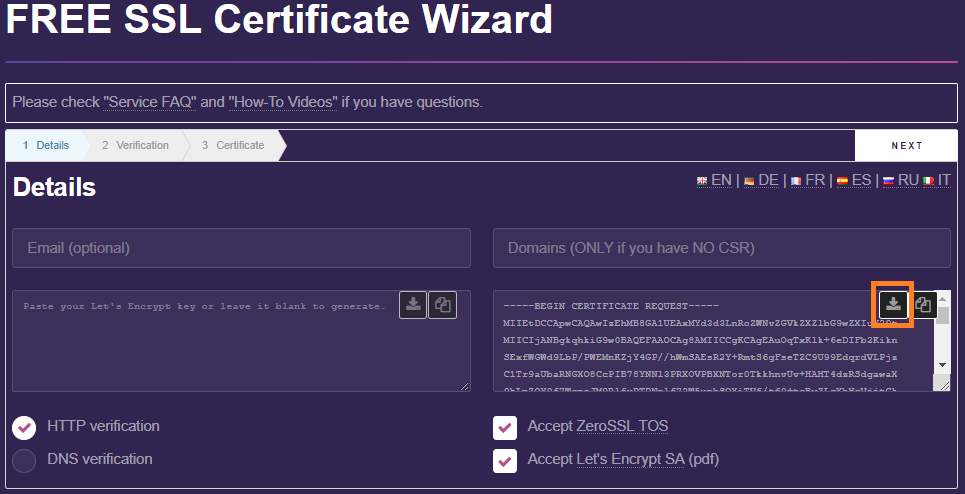
8. Hit Next button in the top right corner, It’s going to start generating account key, this action might take several minutes.
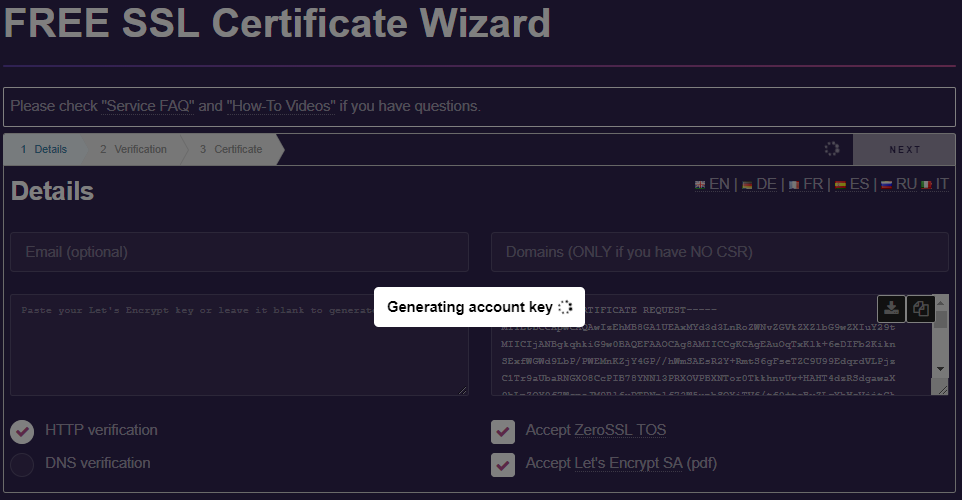
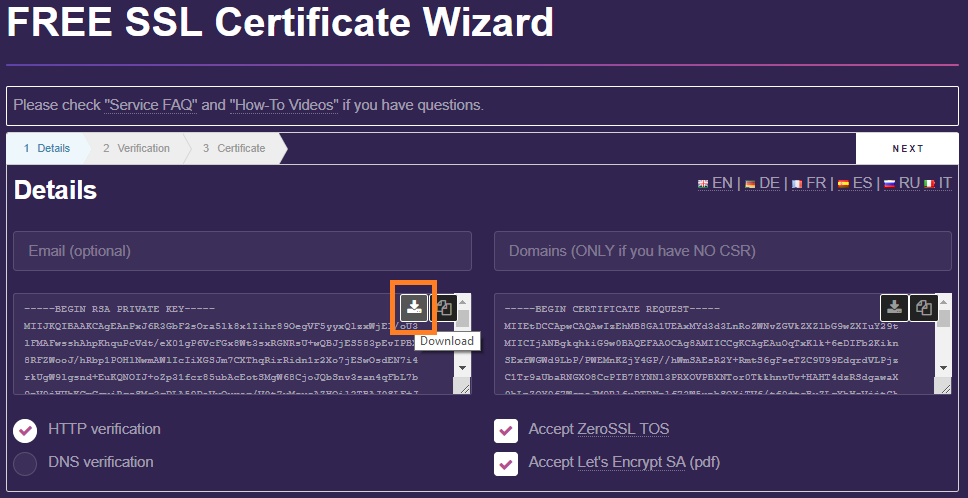
9. Once generating account key process completed then copy or download your account key and then click on Next button to continue.
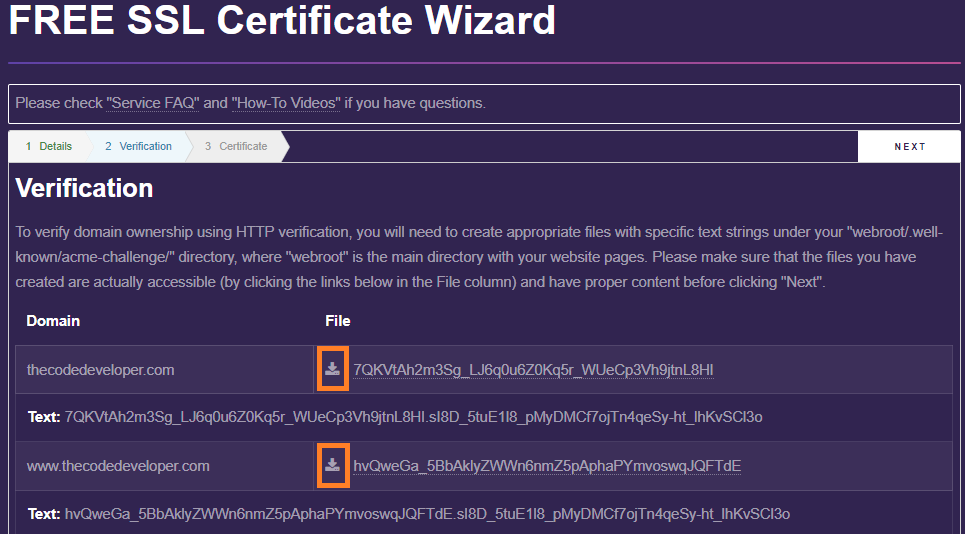
10. To verify domain ownership using HTTP verification , you need to download both txt file.
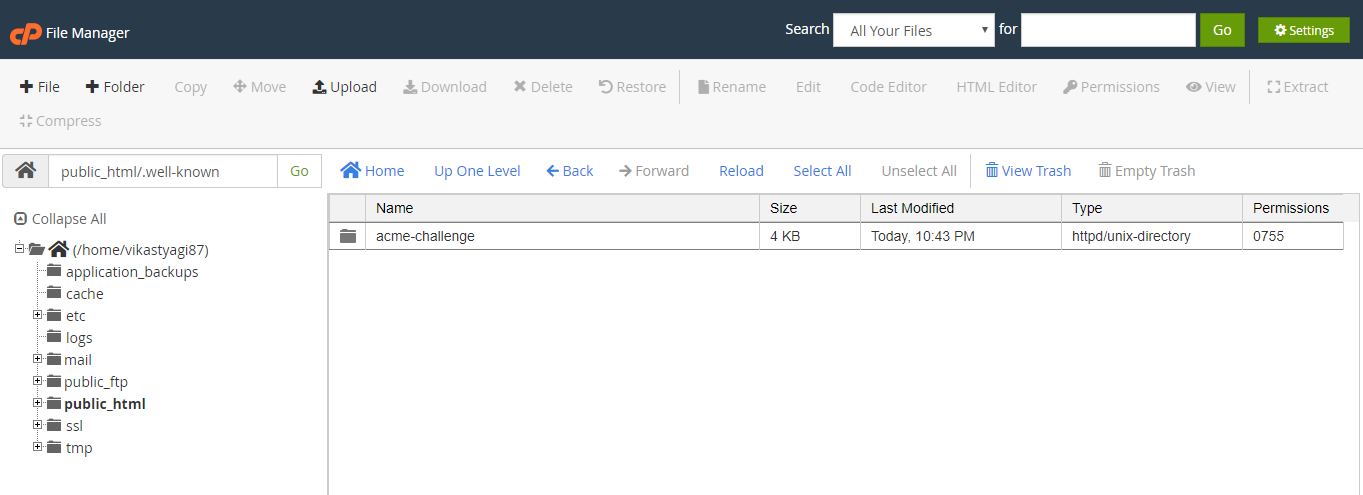
11. In root directory first create a new folder .well-known and inside it create a another folder acme-challenge . So your path should look like this:
“youdomain.com/.well-known/acme-challenge/”
You can learn how to create new folder in cPanel hosting with below steps :
- Log in to your GoDaddy account.
- Click Web Hosting.
- Next to the cPanel account you want to use, click Manage.
- Click cPanel Admin.
- Click the File Manager tab.
- Click +Folder.
- Complete the on-screen fields, and then click Create New Folder.
- New folder name should be .well-known.
- Then create a another folder an acme-challenge inside .well-known folder, sometime after create .well-known folder that folder does not show, then in this case in left side type public_html/.well-known, click Go button and then continue create acme-challenge folder.
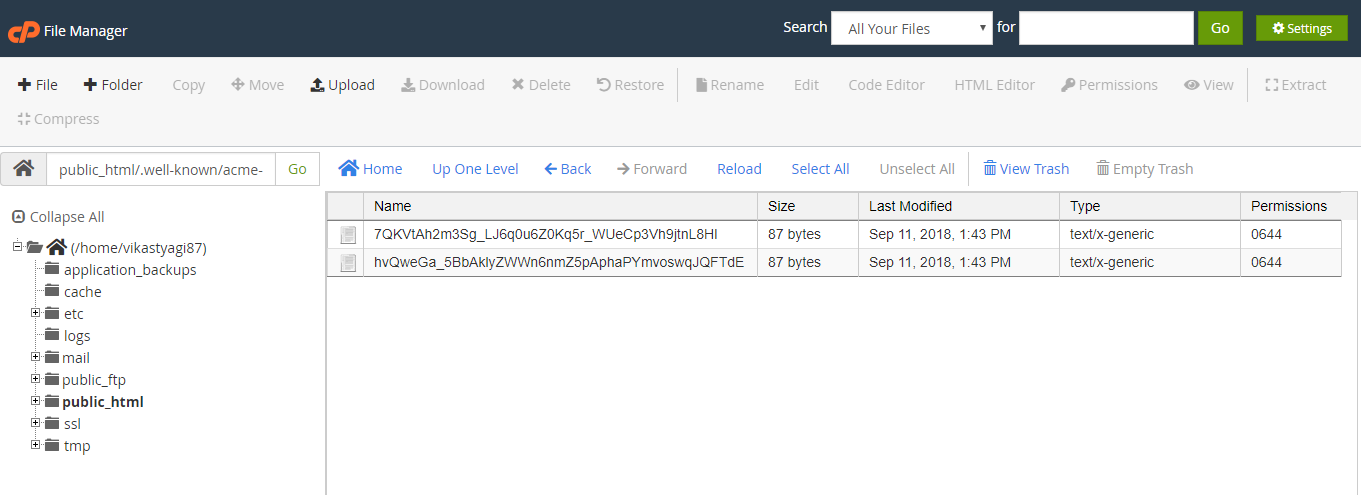
12. Upload the both two .txt files inside the acme-challenge folder, which you downloaded on step 10.
13. After then go back to zerossl tools and click on the highlight link in the screenshot to make sure you uploaded files in right folder.
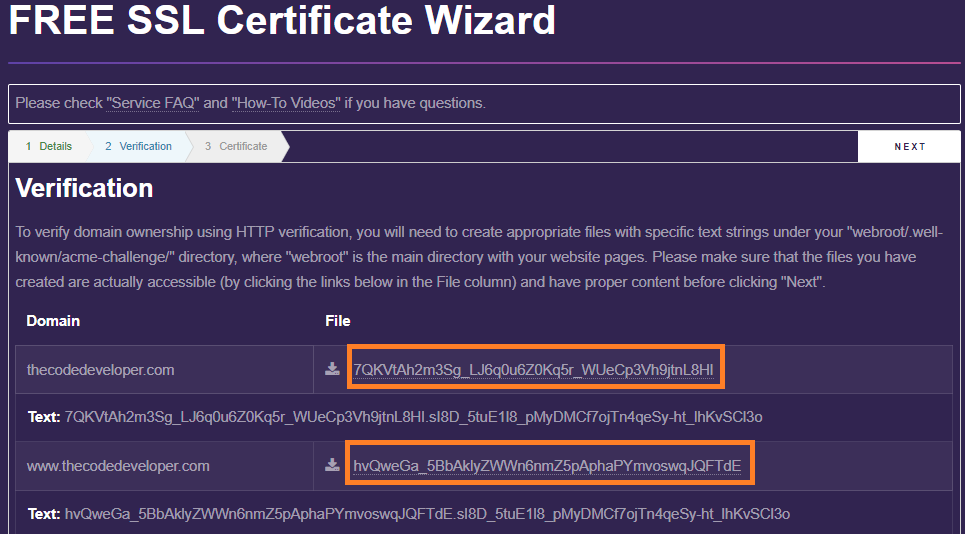


14. Click on Next button.
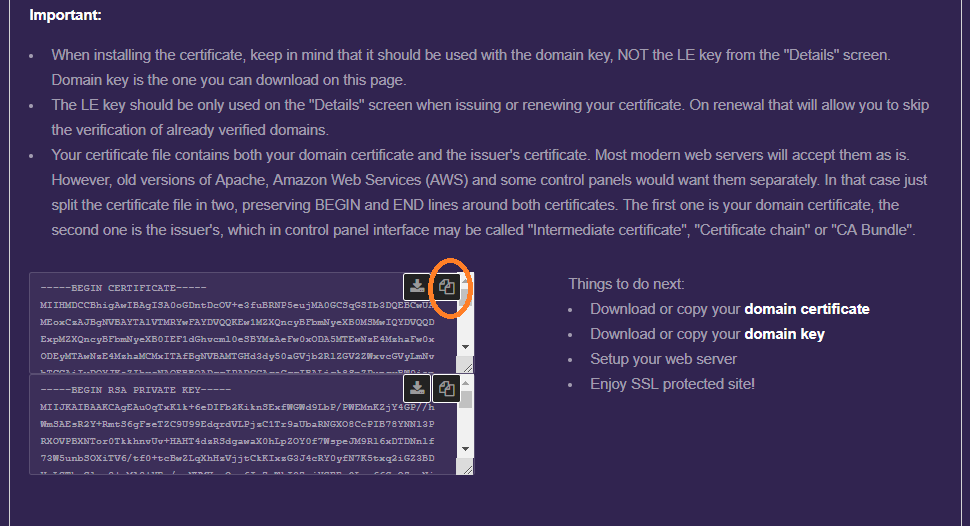
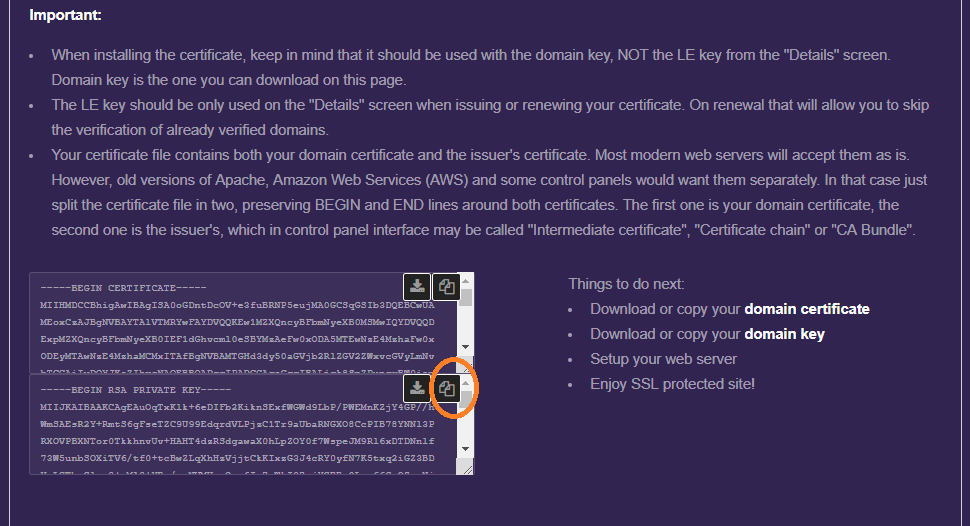
15. Now your certificate is ready now, things to do next :
- Download or copy your domain certificate
- Download or copy your domain key
16. Go back to cPanel
- Log in to your GoDaddy account.
- Click Web Hosting.
- Next to the cPanel account you want to use, click Manage.
- Click cPanel Admin.
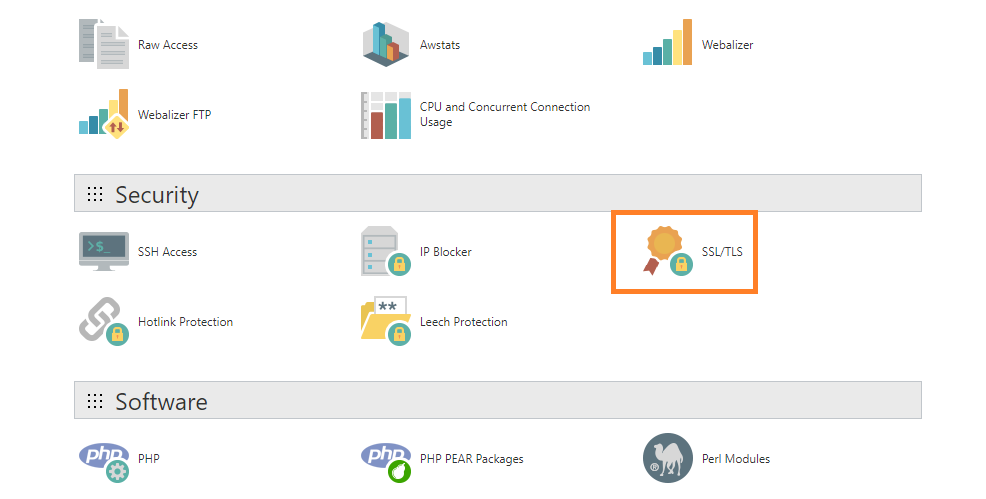
- Click SSL/TLS.
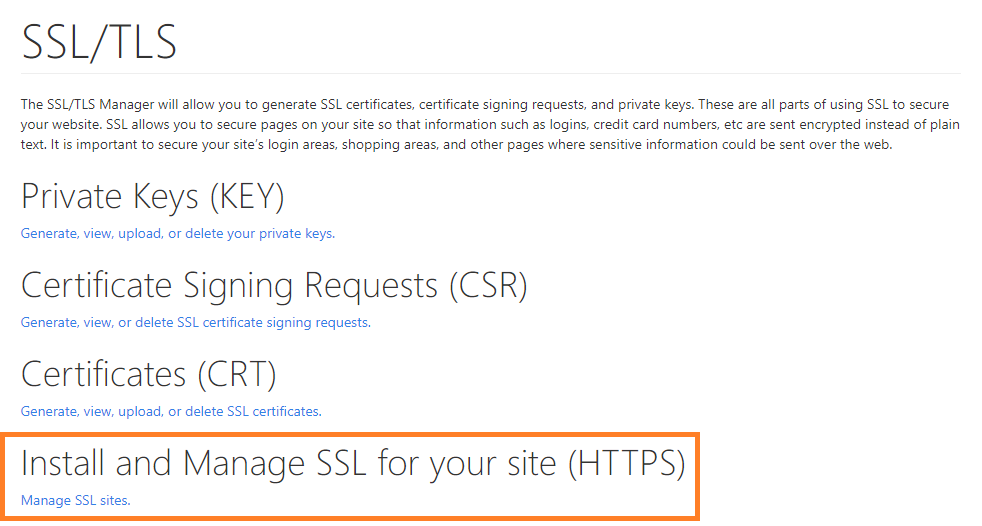
17. Click on Manage SSL sites link.
18. Select the domain you want to install the SSL certificate on, you can see i selected my domain thecodedeveloper.com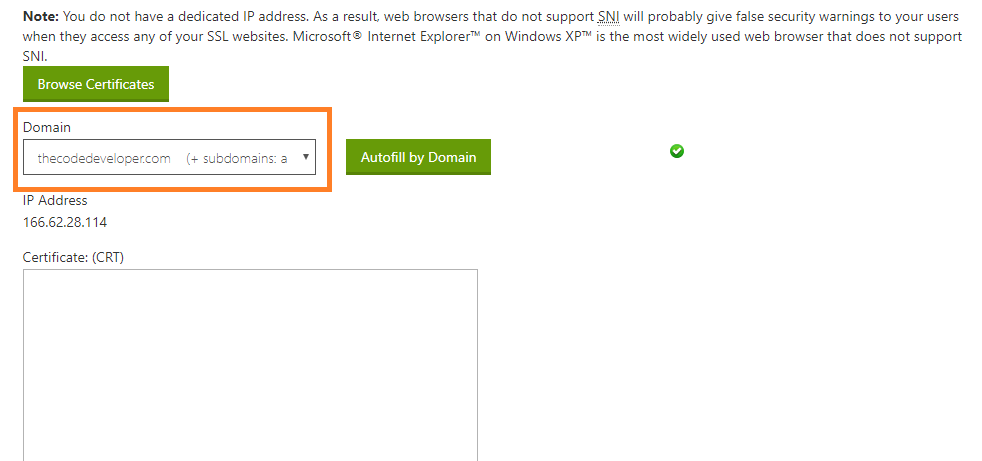
19. Go back to zerossl, copy the certificate and paste it into first Certificate : (CRT) field in cPanel Admin
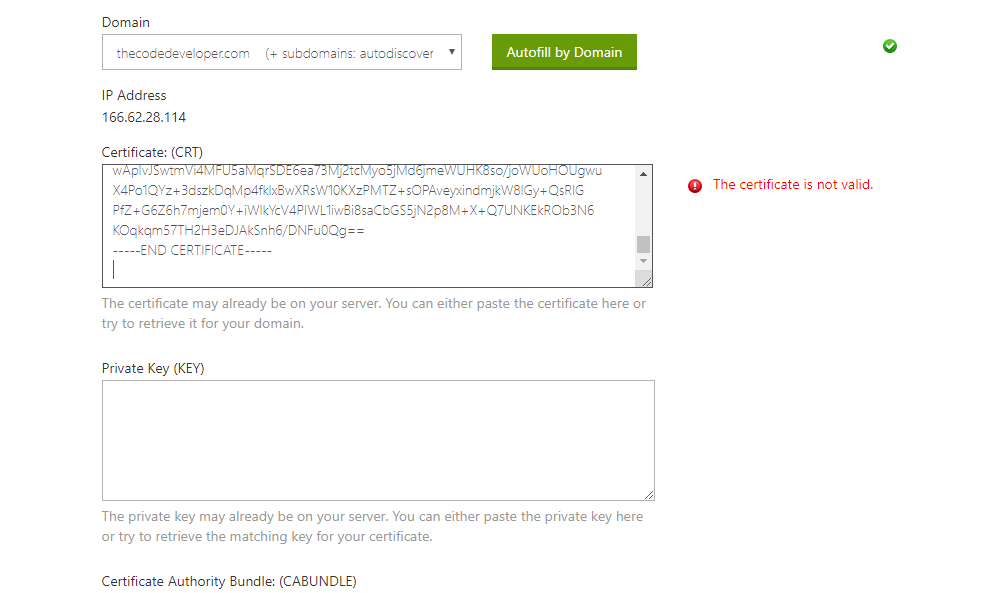
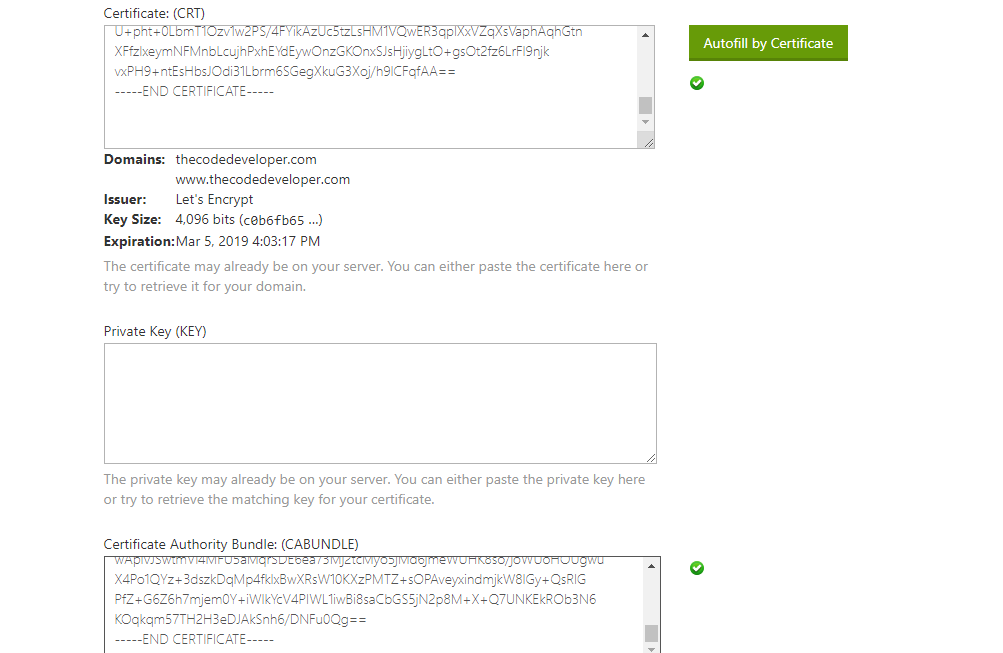
20. Cut out the Certificate Authority Bundle from certificate and paste it in the third field –
Once you paste certificate first field then your certificate look like –
——-BEGIN CERTIFICATE——-
some big random string
——-END CERTIFICATE——-
——-BEGIN CERTIFICATE——-
some big random string
——-END CERTIFICATE——-
then you need to cut second part (which start ——-BEGIN CERTIFICATE——- ) till end from first field and paste it in the third field.
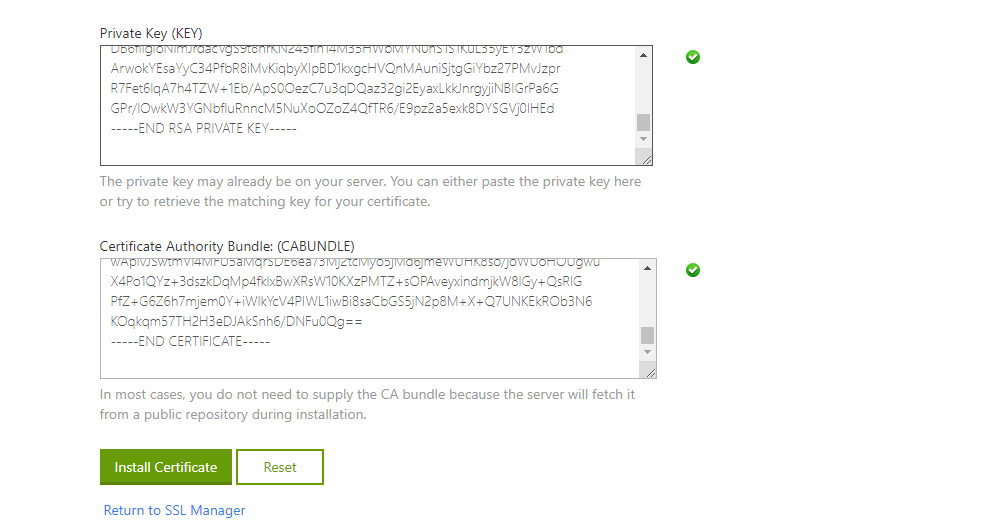
21. Go to zerossl and copy private key.
22. In cPanel paste the private key in the second field Private Key (Key)
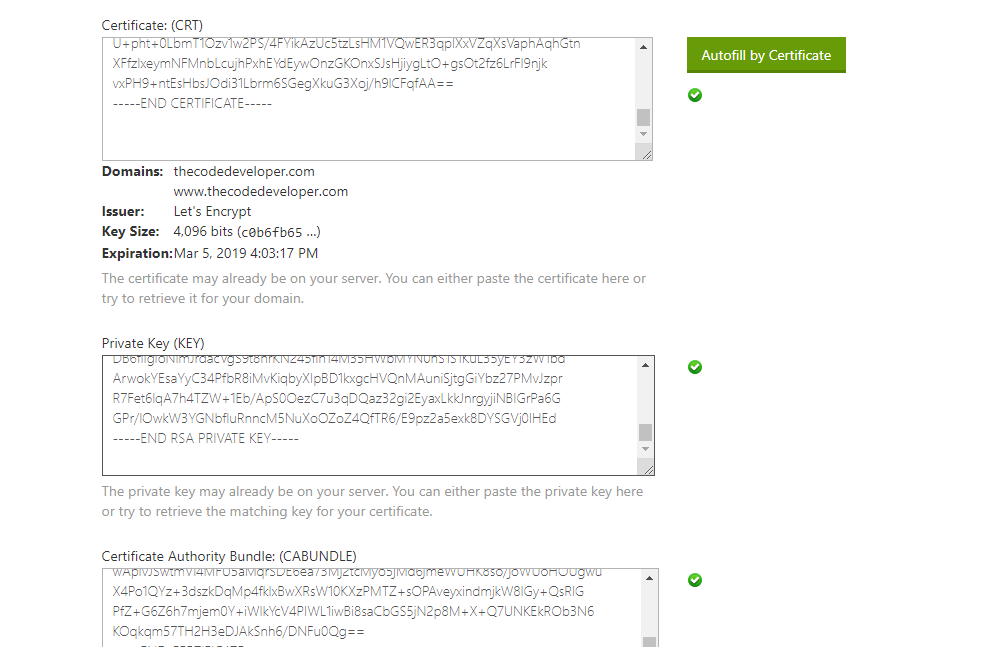
23. All fields should have 3 green check marks, this means everything matches and now click on Install Certificate button.
24. Your SSL Certificate is now installed, and you can test it after adding https:// to in front of your domain for example https://www.mydomain.com.
In my case i tested https://www.thecodedeveloper.com/
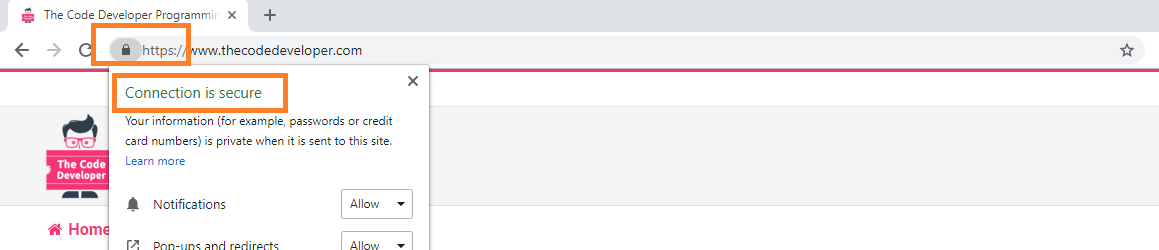
25. If you see the green lock in front of your URL and connection is secure means SSL Certificate install successfully.
I hope you like this Post, Please send me any comment, suggestion or correction you may have – we are here to solve your problems.
Worked, Thanks a lot bro i installed SSL Certificate without renew.
I am so glad! Thank you.